Showing posts with label homemade ornaments. Show all posts

Monday, December 12, 2011

Let it Snow, Let it Snow, Let it Snow-Day Six


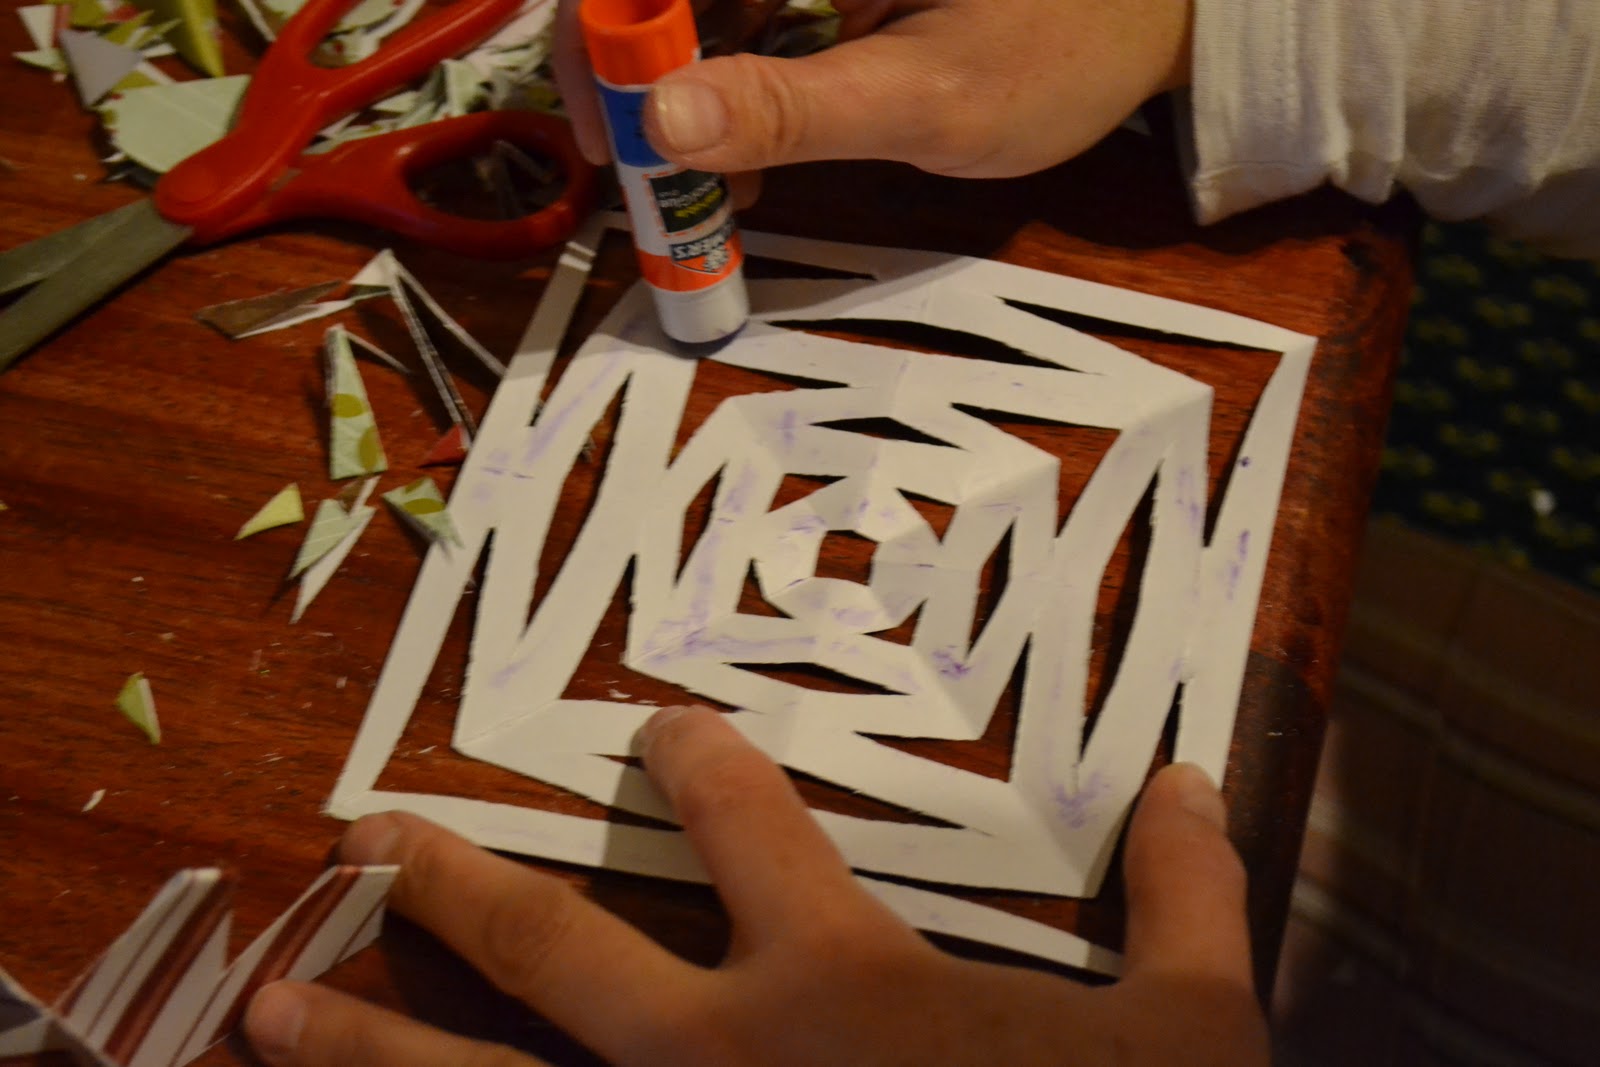
Since we really haven't had the snow that I want for Christmas, I thought we could decorate the tree in "snow flakes". Pretty paper snow flakes! Paper snow flakes have been used to decorate our homes windows for years. I think as soon as my kids could fold paper, we have made paper snow flakes. When the first snow hits, over hot chocolate after building the first seasons snow man, paper snow flakes were made (okay so maybe not that Norman Rockwell style, but it sounds lovely doesn't it.) Regardless of how less than perfect the scenario is when we make them, paper snowflakes are a beautiful edition to our tree.

Instructions:
1. As many sheets of paper you want. Just keep them square.
2. Fold and fold and fold again.
3. Glue and hang with ribbon.
See that is not hard right.....right.....okay here are some pictures:


Once you have all your snow flakes cut, you can string ribbon and hang them from your tree, or glue them to make them more three dimensional. Like this:


And then you end up with these:
I should warn you, be prepared for a mess because once you start cutting, little paper triangles go everywhere :)
So here is how it looked on our tree....

 They don't look like traditional snowflakes, but I like them better.

 I bet you could never tell that a elementary age girl made this "heart" snowflake...love her creativity :)

Monday, December 5, 2011

Got the Munchies?-Day Four

After a very long 4 days of sickness I now have the energy to blog. Who knew that strep throat, sinus infection, and bronchitis could be so exhausting...HA this girl now knows!
My kids really missed doing the decorations and truth be told, I did too. So here it is, our day 4.... You know those hand thingys that you made in grade school that you put the names of colors on the outside flaps, spell it out and pick a number on the inside flap, count out the number, pick another number and lift the flap to reveal a message to read....I know they have a name. I don't know what it is. So my youngest daughter started calling them munchies and that is what they are known as at my house.
I was just playing around with my youngest and started folding one out of scrapbook paper. It looked so cute and I didn't think anything of it until she turned it upside down. Then the crafty side of brain started to tingle and a new paper ornament idea was born.

 I am sure these pictures will help jog your memory of how to make them. Really simple and I would suggest finding scrapbook paper that has designs on both sides. I hung it up side down and liked having a dual design.
 I am posting these pics and thinking, Red- R-E-D, pick a number....5...1-2-3-4-5....pick another number, 7...You are Cute...grade school memories......
 Don't forget to flip it over, my younger kids always forgot this step and didn't understand why there were no tabs for them to slide their fingers in.....
 Almost done....don't you love picture help, I do, I am awful at reading instructions and I could type in Wally Walrus Writes a Riddle in here and you may not even know it.....
 Almost done.....anyone remember MASH papers....this tree project sure has the old school notes, games and paper projects falling out of the wood work....
I fold it along the "crease" just to break it in a little. Makes it easier to slide your fingers in...


 Now slide your thumb and forefinger from one hand on one side, and slide your thumb and forefinger with other hand on the other side....clear as mud right?
 Ignore the mess, I was still decorating, and well I rarely set up shots, I just click and you get to see my nonexistent photo set up skills at work....
Did you ever make yours with boys names that you had a crush on....those were so "scandalous"


Whew that was a lot of picture....still with me? Now just turn then upside down, punch a small hole in the center and loop a ribbon through and tie it off. Ta DA! You now have a munchie ornament.


 If you missed our 12 days of handmade ornaments, here are links back to the beginning....
Grade School Paper Chains-Day Three
Mother Nature Deserves Sparkle-Day Two
It All Starts With a Tree- Day One

Monday, November 28, 2011

Mother Nature Deserves Sparkle-Day Two

Day two of our handmade Christmas was solely dedicated to secrets. I love pine cones. And this time of year they smell so good soaked in cinnamon...so I picked up a bag at our local craft store and brought them home. I was going to pour them into my wooden bowl, add a few cranberries, and some tree sprigs and make a nice center piece for our coffee table. But my youngest daughter said "our Christmas tree is a pine tree right Mom", "Yes dear it is", "Well then it needs pine cones" And I am happy to report she was right.


We took some ornament hooks and hot glued them to the bottom of the pine cones. I wanted the pointy end down. The fun thing with a bag of pine cones is that they come with 2-3 varieties of pine tree cones, which adds some whimsy and fun to your tree.
Once the glue had dried and the hooks were secure we reached way back into the branches and hung the cones. You can't see them unless you really look for them, but it's fun to have the surprise of seeing them at different angles and lights. We played spot the pine cone 2-3 times and tried to count them all. I know I had 30 pine cones that went on the tree but I still haven't found them all yet.
The pine cones were an added bonus to our day two because my "planned" ornament was all thanks to Pinterest. I seized on the idea of 1 inch mirror tiles for ornaments. One to help reflect the lights and two to add just a surprise hint of sparkle. I didn't photograph this because I was gone when my sweet oldest daughter decided to glue them together but it is rather simple. Lay one tile with the mirror face down, put a dollop of hot glue on the back, enough glue that your ornament hook and another mirror will stick together. Layer back of mirror tile, ornament hook, back of another mirror tile. Let dry. Simple, easy, and sparkleific!
Now reach back into the tree, behind the lights, and hang them up. You may not see a big difference but sit back and have someone wiggle the tree slightly. All of sudden lights will move and if you are anything like me, your heart will skip a beat.

Sunday, November 27, 2011

It All Starts with a Tree

If someone would have told me 5 years ago that having my oldest son, destroy, lose or ruin all the ornaments I had been collecting for my kids for years would be a great thing, I may have stuck my tongue out at them. But it's true....we have a much more crafty Christmas as a family. And my kids still talk about the last five Christmas' more than they did the previous five.


It starts with a tree, and not just any ole tree but a tree that I spy at the tree lot that "speaks" to me, one that when I look at all it's branch glory and lil gaps inspires me with ideas. I found such a tree this year and I was inspired by nature, sparkle and just family fun...images of my family around the table laughing, singing, ok being honest a little fighting filled my head...so we bought her and brought her home.
This year we are making handmade ornaments, throwing in some sparkle and mother nature too....follow along for the next 12 days to see how we take "just a tree" to Christmas magic. It all starts with a tree and a lot of lights...